For the convenience of our riders, ACRTA transit buses are equipped with bike racks on the front of each bus.
Bicycles are not permitted inside the bus, but each easy-to-use bike rack holds three bikes and is available on a first come, first-serve basis. These racks are for the use of two-wheeled adult and children’s bicycles and not motorized bikes or other devices.
 Collapsible Bikes
Collapsible bicycles are permitted if they are not placed in a seat that will force a passenger to stand.
Loading Bikes
Adults are asked to load children’s bikes and care should be taken to properly and securely load the bicycles onto the rack. ACRTA is not responsible for damage to bikes or other property.
Safety
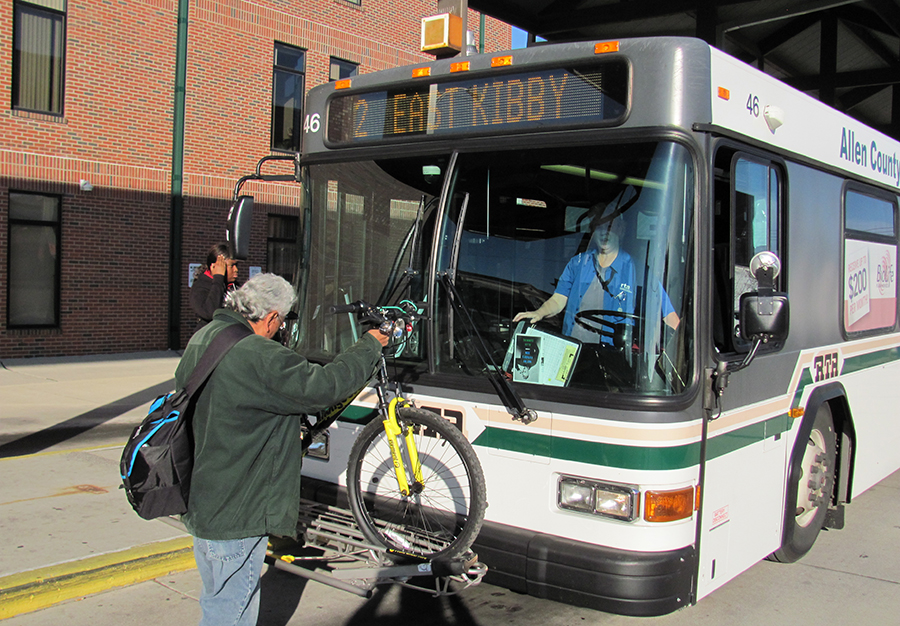
Please follow these steps in loading your bike on the ACRTA rack.
- Prepare your bike for loading by removing water bottles, pumps and other loose items that might fall off once the bus is moving.
- Once the bus stops to pick you up, let the bus driver know that you will be loading your bike. Do not step into oncoming traffic to load your bike, load your bike from the curb or the front of the bus.
- To release the bike rack, squeeze handle up to release the latch, then fold down the rack. You will not have to lean your bike against the bus to lower the rack. The rack is easy to unlatch and pull down with one hand so that you can hold your bike with your other hand. In the case of the rack being lowered and a bike already on the rack, please use another available wheel rack. If the rack is full you will need to wait for the next available bus.
- Lift your bike onto the rack and fit the wheels into the proper wheel slots. Each wheel slot is clearly labeled as to where the front wheel should be placed. This directional placement allows the bike to be easier to unload.
- Raise the support arm over the front tire so that it can add support to the bicycle when the bus is in motion or at rest. Bikes with especially thin rims and tires will sway back and forth when the support arm is not in use so it needs to be raised so that the hook rests beyond the highest point in the tire, closest to the frame, to ensure that your bike remains in place.
- When boarding the bus choose a seat near the front of the bus to keep an eye on your bike. DO NOT FORGET that you have a bike when you exit the bus at your stop – it’s easy to do if you are new to riding.
Unloading your bike
- Let the bus driver know that you will be unloading your bike when you approach your stop. After exiting the front door, unload your bike from the front of the bus or the curb. Be sure not to stand in the street in oncoming traffic.
- Raise the support arm off the tire. It will automatically fold down to a secure position.
- Lift your bike out of the rack.
- If there are no bikes on the rack and no one waiting to load a bike, fold up the Bike-Rack-for-Buses.
- It will lock into place.
- Step away from the bus with your bike.
Bike riding tips
- When riding at night be sure to have working lights on your bike and wear light-colored clothes.
- Carry a flashlight or reflector so the bus driver can see you.
- Never cross in front of a bus unless the bus is stopped at a red light.